Please
follow the instruction provided below to install the program. You can
down load the program from the Web or from your CD.
If you have purchased the product, you should have received an e-mail
with a
Serial Number in a form of AAAA-BBBB-CCCC-DDDD. If
you have Access 97 please follow the instruction
here.

The program can be installed from the web from
here. Please make sure you use
the
Serial Number provided as part of your package. Once you start
the instantiation, please follow up from step 3.0

2.1- Please insert the CD and use the
MS Explorer to open the correct folder.
Note: Start MS
Excel, then choose About from the Help menu to check the
MS Access version.
|
MS Excel
|
Folder
|
| MS Access 2002 XP |
Office 2002 XP Products |
| MS Access 2000 |
Office 2000 Products |
| MS Access 97 |
Office 97 Products |
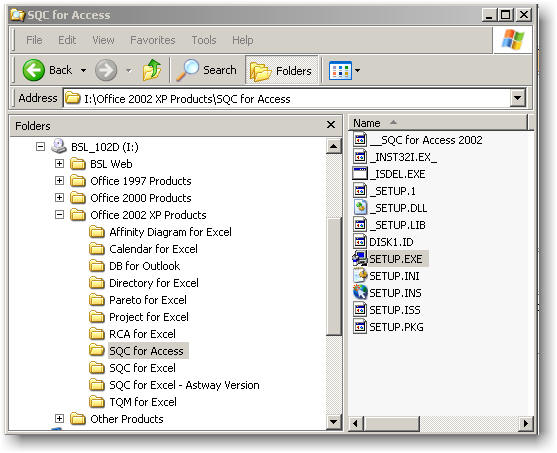
2.2 - Open the correct folder and then Double click on the file
called SETUP.EXE and follow the instructions.

3.1 - Once the welcome page is displayed, please click the Next button.

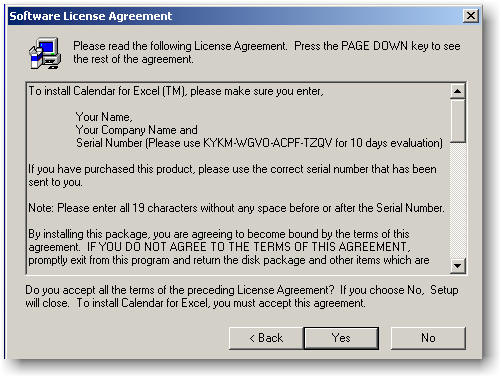
3.2 -
Click the Yes button if you agree with the user agreement.
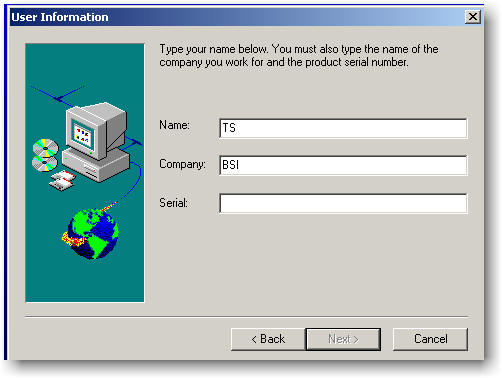
3.3 -
Enter the Name, Company Name and the Serial
number. If you have purchased the product, the
Serial Number has been sent to you
by e-mail. Otherwise use the one from the Web-Page or click the Back
button and read it from the license agreement.
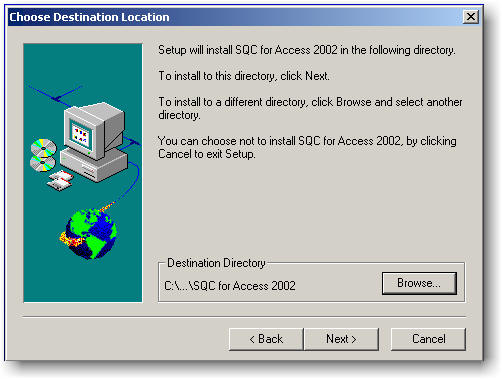
The default directory that the program is installed is very important.
All demo files are located in this directory. If you change the default,
please take note for the future use. Otherwise click the Next
button.
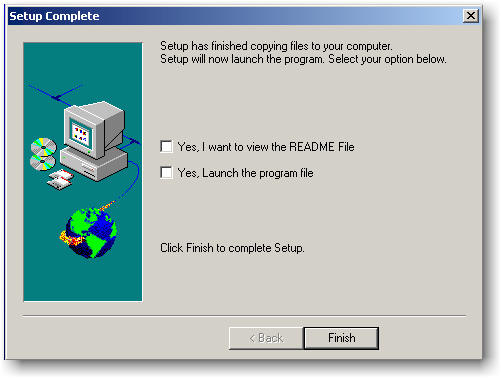
3.4 -
Follow the instructions and make
sure, you select the "Yes, Launch the program file" and Click
on the Finish button.

4.1 -
The program automatically start MS Access and you will get the following
dialog.
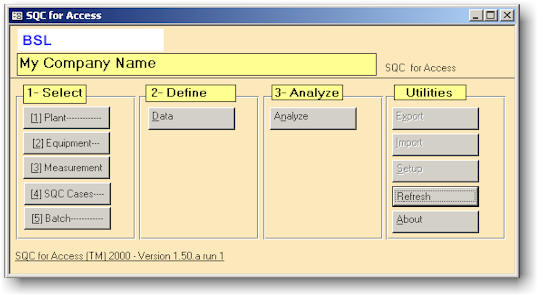
Note: Please make sure you have installed version 1.50a
or higher.
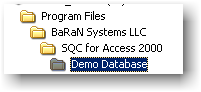
4.2 -Open the folder that
you have installed the program. Usually
C:\Program Files\BaRaN Systems LLC\SQC for Access 2000
Double click on the file SFA_Main_2000_V150.MDE
Where
_2000 is the version of MS Access and
_V150 is the version of the SQC for Access
program.
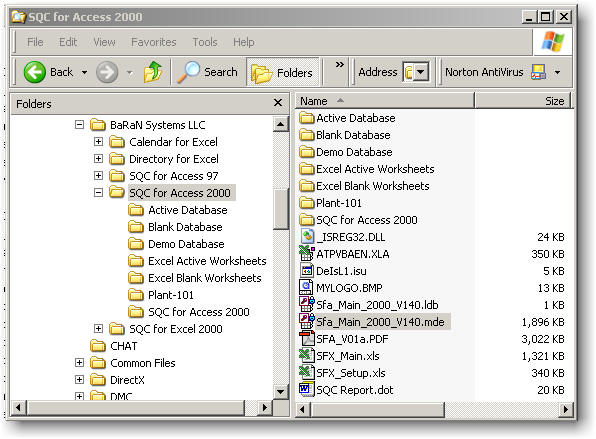
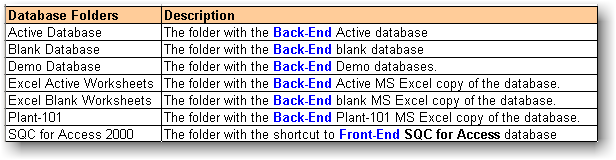
The following describes the description of the folders and files
in this directory.

The program will be
starting with the following page.
Note: Make sure you have installed version 1.50a or
higher.

4.3 -If you get the following screen, it means you have installed SQC for
Access in a different directory location than its default location.
Please follow the instruction in next section to
connect to the correct database.
Note: Please click the Cancel button few times to
get to the above screen.

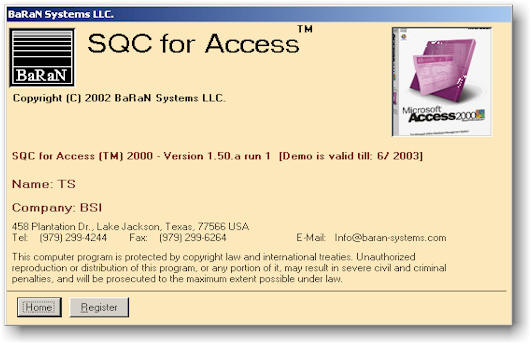
4.4 - Click on the About
button and review the registration status. If you are testing a DEMO you
should get the following screen.
If you have purchased the product, please click on the Register
button. Otherwise click on the Home button.
Please enter the
Serial Number provided in your license package (Please read the e-mail from
Digibuy.Com or RegNow.Com). Make sure you enter all 19
characters without any space before or after the
Serial Number.
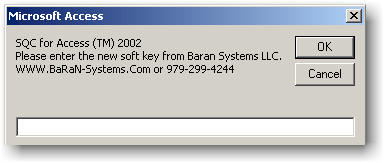
When you enter the
correct code the following screen is displayed.

5 - Connect to the Back-End
Demo Database
The SQC for Access™
utilizes the MS Access as its engine. A generic relational database have
been developed as a Quality Database.
The SQC for Access™ program is designed
as a split database. A split database consists of two database files:
- One database (called the
Back-End
database) contains only the tables (Data)
and relationships (Data to Data).
It resides on a network file server in the multi-user database.
- The other database
(referred to as the Front-End
database) contains all the other database objects: queries, forms,
reports, macros, and modules. It resides on each user's computer.
Single-User Setup

Multi-Users Setup
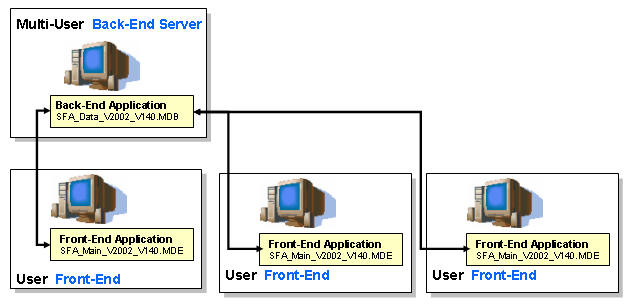
A Back-End/Front-End
database design works well in multi-user environments. It offers
these advantages:
-
Performance is improved because the application
portion of the database, the user interface, is on the user's local hard
disk.
-
Network traffic is reduced because only the data
travels over the network; all other objects in the database are local.
-
Updating your application is easier. You can make
design changes to the front-end database, and then distribute the
changes to users without changing any of the data in the back-end
database.
-
In non-runtime environments, users can create their
own custom objects, such as queries, forms, or reports, without
affecting other users.
5.1 - Start the SQC for Access
program
Start  All ProgramsSQC for
Access SFA_Main_V2002_V150.MDE
All ProgramsSQC for
Access SFA_Main_V2002_V150.MDE
or
Start All ProgramsMicrosoft
Access Open
- Program Files
- BaRaN Systems LLC
- SQC for Access 2002
- SFA_Main_2002_V150.MDE
If you get the following screen, please click the OK button and then Cancel button few times
to get to the main screen.
5.2- Click the Setup
button.
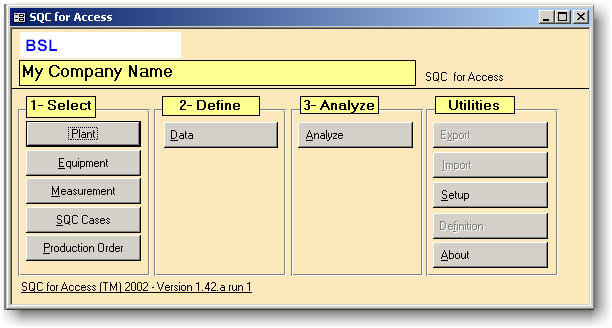
Note: When you open the SQC for Access for the first time,
the Setup is NOT enabled. please
click the label "SQC for Access" to enable it.
5.3- You have few choices here. You
can connect your data base to one of the following:
A- Connect to the
DEMO Back-End
Database to review the SQC for Access program.
B- Connect to the TEST
Back-End Database to test the
functionality of the SQC for Access program.
C- Connect to the ACTIVE
Back-End Database to start using the
SQC for Access program.
We strongly recommend that you follow the above order to get
familiarize with the SQC for Access program.
Please do the following to connect SQC for Access (Front-End)
program to the DEMO (Back-End)
database.
1- Click the Select the DEMO Back-End Database button.
2- Click the Link to Back-End Database button.
3- Click the Home button.
4- Click the Setup Button.
Note: Please make sure you enter a
correct Working Directory such as
C:\SQC_for_Access

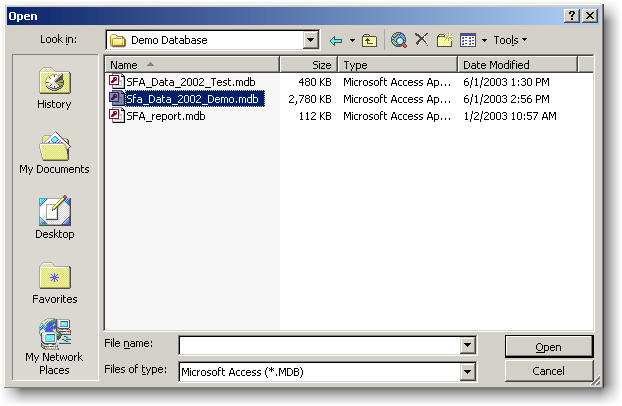
In case that file was not
found, please click on the BROWSE button and navigate to the following
folder and file.
From File menu option select Exit or click on the X in the
left-hand side of the screen. This to save the current saving.

Start the SQC for Access as shown in step 1.