Calendar for Excel™ is a Microsoft® Excel macro that creates a variety
of calendars and planners.
This section provide you with the following Step by Step procedures:
- How to Start Calendar for Excel
- How to Build a Monthly Calendar
- How to Build a Daily Planner
- How to Merge a Database to a Monthly Calendar

A- From the Start button,
select the All Program and then select the Calendar for Excel
folder.
B- Double click on the file name
Calendar for Excel or Advanced Calendar for Excel.
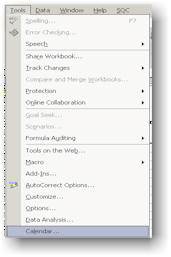
C- Once the file is open, select
the Calendar option from the Tools menu.

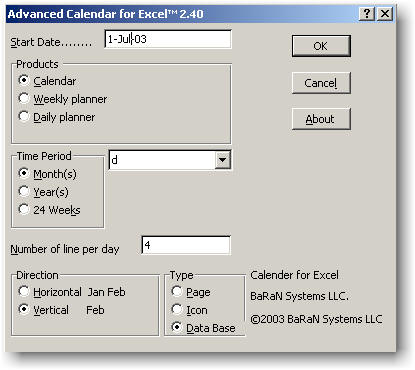
A- Start the Calendar for Excel as
shown above
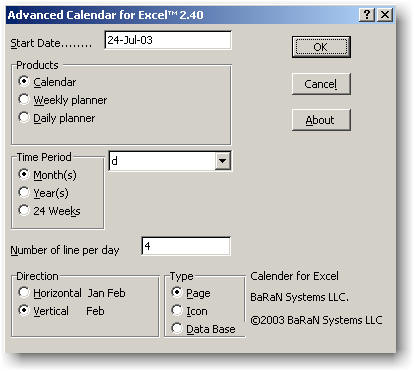
B- Select the following:
- Start Date: The 1st of which the Calendar will be generated
- Time Period: The type of Calendar
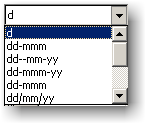
- Type of Display: The calendar will show the date as
- Number of lines per day: The number of rows per day
- Direction: Jan Feb Mar Apr or
Feb
Mar
and click the OK button.

A- Start the Calendar for Excel as
shown above
B- Select the "Daily Planner"
Option and click the OK button.
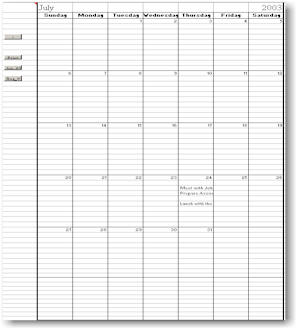
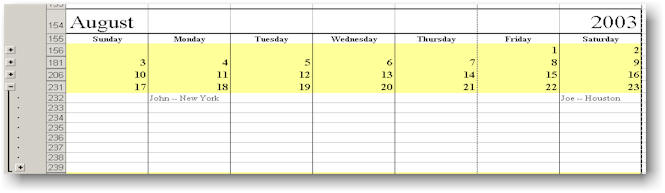
The calendar will be generated for a month and then the program will be
asking to SAVE the planner.
Please use the name suggested otherwise the internal linkage will be
broken.
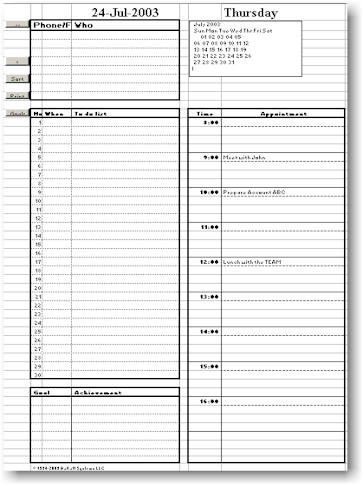
The data typed in the Appointment next to the HH:MM will be displayed in
the Monthly overview.
Clicking on the monthly appointment will move you to the correct page.

Step 1 - Prepare the Database
Please do the following:
1. Open the Excel workbook with the
database stored in one worksheet
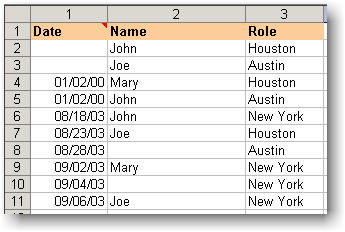
The data should have three columns with the following data
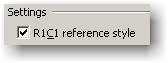
2. Identify the column number
that these information are stored. MS excel normally displays the column
name (for example A, B...) to display the column number,
Please choose Options from the Tools menu.
Select the General Tab and then select R1C1 Reference Stype.
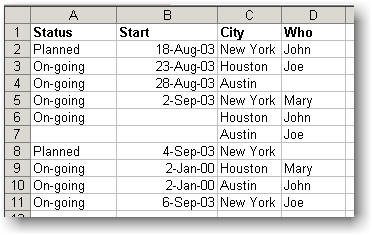
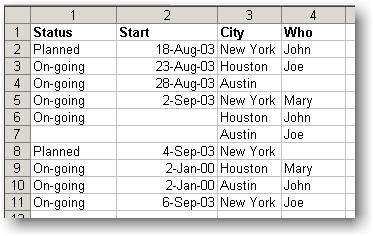
- Date
Column 2
- Name
Column 4
- Role
Column 3
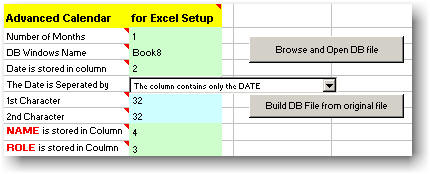
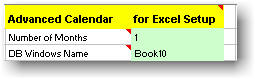
3. Enter the column number in
the Advanced Calendar for Excel data entry form as shown below.
4. Save the database workbook and
make sure that the database worksheet is OPEN worksheet when you save the
workbook. After that please close the workbook.
5. Click the button labeled "Build
DB from original file"
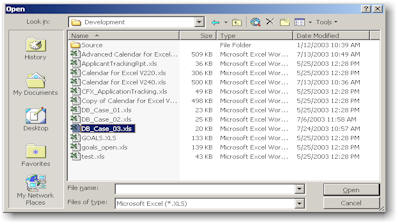
6. Open the file with database (for
example DB_Case_03.XLS) and click the Open button.
Note: If the file is already open you will
receive a warning message. You must select the YES button to proceed.
7. Review the newly created file.
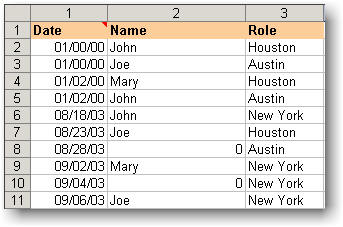
Please note that the empty date cells are translated to 0 of January
1900 (or date Zero in MS definition) and empty name cells show
value of Zero ( 0 ).
The zero display can be fixed by un-checking the Zero values
option. Please choose Option from the Tools menu and then
select the View tab.

Please note that the DB Windows Name cell has the value of
Book10 which the name of the newly created workbook.
If you would like, you can save and close the workbook and then click
the "Browse and Open the DB.." button to re-open it.
8. To create the Calendar with
merged database, please select the Calendar option from the Tool
menu.
A- Make sure you enter a Start Date that is smaller that the first date
in your database.
B- Make sure you select the Database option in the Type
dialog box.
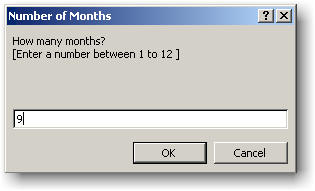
C- Please enter the number of months that covers the duration of the
database.
The Requested Calendar is generated and clicking on the button
 can expand the
calendar into different views.
can expand the
calendar into different views.