|
Please do the following:
Step 1:
Start Adv-Calendar for Excel
Step 2:
Clean up the Database sheet
Note: Do this if you have your own data, otherwise go to step
3
- Click
on the Tab called Database
- Place
cursor in cell A2
and while pressing the Ctrl
and Shift keys press the Down
Arrow and then Left Arrow keys.
- Clean
the worksheet by selecting from Edit
è
Clear è
All
Step 3:
Enter the data with the
following roles in a workbook:
Column A: Start
Date
Column B: End
Date (same as Start Date if activity happened in a same day)
Column C: Name
Column D: Role
Note:
There should be no blanks in column A or B
Step 4-
Generate the Calendar DB
- Click
on the button called Transfer M-Date to Calendar DB
 - The
program generates a new workbook (remember its name)
- From
menu select Window è
Advanced Calendar for Excel
- Click
on the Tab called Database
- Review
the errors
- Make
sure you correct all errors and redo this process to get all of your
data
Step 5-
Save the Calendar DB
- Save
the newly generated Calendar DB in a folder
- Say
C:\My_Calendar
and file name book1.xls

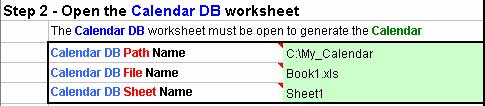
Step 6-
Open the workbook as Calendar
DB
- From
menu select Window è
Advanced Calendar for Excel
- Click
on the Tab called Setup
- Click
on the button called
 - Note:
If you can not see this button, please click on the 3 button on the top
of worksheet

- Open
the Calendar
DB file.
- You
should get the following
Step 7-
Generate Calendar using Calendar
DB
- Make
sure you enter the following
- Click
the button

- Make
sure you enter correct date and click OK
Step 7-
Review

And click on the
C:\My_Calendar\Index1.htm
|

